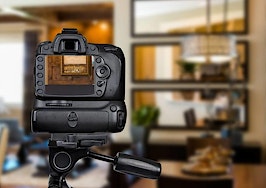
- Hire a professional -- your iPhone won't cut it on some high-retina display screens.
- Clean up before you shoot, and keep light in mind.
- Mind your angles, and be respectful.
It’s almost automatic. You get a listing, you get photos. Easy enough, right?
But don’t go on autopilot just yet. Here are a dozen photography mistakes that could cost you.
1. Don’t underestimate the power of great photos. After all, they’re not just for the MLS anymore. Beyond print, listing photos are making appearances in website galleries, 3-D floorplans, virtual tours and video slideshows.
You’ve scrolled through those monster listings sites. You know some photos stand out more than others. Make sure yours are the ones that grab buyers’ attention — in a good way.

Stock-Asso / Shutterstock.com
2. Don’t use your phone camera.
Yes, yes, everyone’s saying how great the new cameras on phones are getting these days. They’re better than they used to be, but do yourself a favor: hire a professional photographer.
At about 30mm focal length, the iPhone 6 lens isn’t wide enough to capture a room adequately. Even if you have a pro camera, you have enough to worry about with paperwork and open houses. Dealing with lighting, angles, RAW versus .jpg files, processing in post, off-camera flash … Save your phone camera for selfies.
3. Don’t schedule around your tee time.
Nothing ruins a shot like shooting into the sun. When you schedule your photo shoot, clear your calendar and make lighting the priority. Ask your photographer what time of day will give you the best light for the property.
Your photographer will probably hug you just for asking.
4. Don’t forget to hide your keys.
We’re not just talking about the lock box. Many a listing photo has been ruined by a Realtor leaving a set of keys, a purse or a camera on the counter.
In an ideal world your photographer will watch out for distractions, but you’ll save a lot of time if you put your staging hat on and scan the room before the camera starts clicking.
5. Don’t scare anybody.
Spend some time looking at real estate photos and you might get spooked by the ghosts of photographers past reflected in mirrors, shower doors and really shiny pianos. Talk to your photographer in advance about her tactics for keeping reflective surfaces photographer-free.
This might include using a timer, ducking, getting the right angle and good, old-fashioned Photoshop.
6. Don’t be a downer.
Many photographers make the mistake of angling their camera down when shooting a room. Angling can distort straight lines and make you feel a little seasick when you view the room.
If you tilt the camera down, the lines bow inward. Angle it up, and the lines bow out. To keep your pictures looking true to life, be sure and stay on the level.
7. Don’t be narrow-minded.
You need a wide-angle lens to capture a room, so don’t count on your regular camera lens to give you full coverage. Depending on the lens, you’re good between 10mm and 20mm. Lower, and you get the “fisheye.” Any higher, and you start leaving out parts of the room.
Go wide and get the big picture.

Christian Delbert / Shutterstock.com
8. Don’t assume anything.
It might seem like common sense for your sellers to clean up their dishes, put the laundry away and check that the lightbulbs are all in working order. But it’s always a good idea to send a checklist before your shoot date to make sure the house is in tip-top shape for its close-up.
Then send a reminder email to make sure they read the checklist!
9. Don’t be in the dark.
Speaking of light bulbs, give them a workout during the shoot. Photo day is no time to be pinching pennies on the electricity bill. Turn on every light in the house and you’ll be rewarded with sparkling listing photos (and glowing reviews).
10. Don’t make ’em wait.
There’s no such thing as fashionably late for a listing photo shoot. Most photographers are on a tight schedule, and they’re going to want to hit the ground shooting. If you show up late, you might find that half the house has been shot before you get the chance to make any adjustments (like adding plants or straightening drapes).
Get there early so you can get the look you want.
11. Don’t hire a portfolio.
His work may speak for itself, but it’s a pretty good bet your photographer is also going to speak with the sellers. Choosing someone who is pleasant and respectful to your clients always reflects well on you.
12. Don’t drive everyone crazy.
The photo shoot is very important, but so is getting those shots into your eager little hard drive in time for brochures and brokers’ opens.
Be sure and talk with your photographer ahead of time about how she will transfer those massive listing photo files. Dropbox? Google Drive? WeTransfer? None of the above?
Setting up a delivery method in advance will save stress on the receiving end.
13. Finally, don’t sweat it.
I know, I said 12 but let’s make it a bakers’ dozen: Don’t forget to smile. It’s your listing’s big day in the sun, it’s your chance to shine in the face of whatever pressures may come your way.
You won the listing for a reason. Stay calm throughout the listing process, and your clients will, too.
Special thanks to my partner and chief photography officer, Stephen Royes, for his insights.
Brenna Humphreys is co-founder and creative director at Walkthrough Productions. You can follow her on Twitter (@brenhumphreys) or LinkedIn.


